Far too many articles on wildlife photography focus entirely on gear — discussing which brand of camera you should use or which lens is best suited for the job at hand.
But the truth is you can take amazing animal photos with even the cheapest camera!
So with that in mind, here are 10 tips that will take your wildlife photography and backyard nature photos to the next level using whatever camera and equipment you have right now.
#1 – Get out early and stay out late.
The best light of the day is always found during the ‘golden hours’ — the hours immediately after sunrise and immediately before sunset.
That’s when the light is beautiful, soft, and golden. This natural warmth gives your photos that special touch — which makes the subject really stand out.
On the other hand, when the sun is high in the sky later in the day, the light is often too harsh and the shadows too strong — resulting in images that are flat and boring.
It might cost you an hour or two of sleep, but it’s all worth it when you come home with that beautifully lit shot you’ve been dreaming of.
#2 – Shoot in bad weather.
Most people won’t leave the house if the weather forecast isn’t looking great. And many will pack up and head for home when the rain starts falling.
However, some of the best pictures of animals are taken by those who decided to brave the conditions and get out there anyway.
Here’s how bad weather can improve your wildlife photography:
- Storms can provide unusual — and even dramatic — backdrops.
- Capturing falling snow or raindrops will add a new and unusual element to your pictures.
- Poor weather can also provide softer and more pleasing light than clear midday skies — which helps to bring out the fine details in the fur or feathers of your chosen subject.
#3 – Photograph local subjects… the animals closest to you.
It’s tempting to think that you have to fly off to some exotic destination to take good wildlife photos, but exceptional animal shots frequently come from those who’ve managed to photograph local wildlife instead.
Look in your own backyard, explore a local park, or visit the closest zoo.
This gives you a chance to get to know more about specific animals and their habits in their own natural habitats — whether it’s the perch from which they like to sing or the burrow they use every night.
This is all vital knowledge that enables you to be in the right place at the right time to get that winning shot. When it comes to wildlife photography, nothing beats knowing your subjects inside out.
#4 – Bring the wildlife to you.
Setting up bird feeders, nestboxes, and fresh water will ensure that you always have a steady stream of creatures regularly visiting your garden.
You may only attract common garden birds, but this certainly doesn’t mean you should ignore them — if anything, it’s a chance to get creative!
You can set up perches near the feeders to get more natural shots, and you can swap these out regularly to avoid having all your photos look the same.
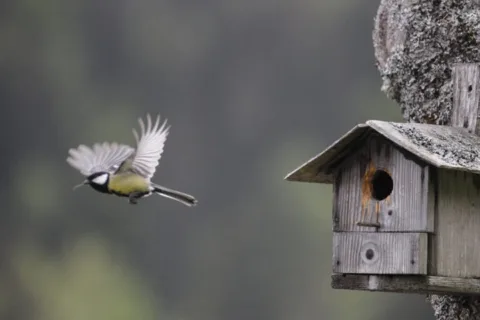
If you’ve got breeding birds coming to a nestbox every few minutes to feed their young, you can just set up your camera nearby and wait for that perfect flight shot as they come in to land.
Even if it doesn’t work the first time, you know you’ll get another chance in just a few short minutes!
#5 – Get down low.
One of the most common mistakes with wildlife photography is always shooting while standing up — which normally means you’re looking down on your subject.
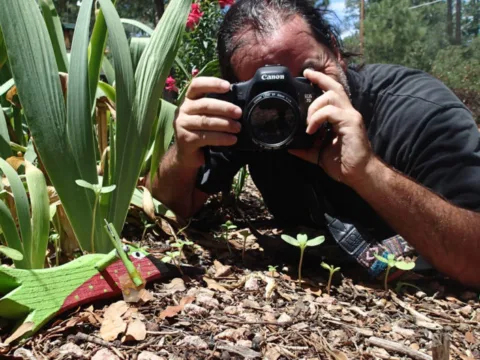
If you drop to your knees or even lie flat on the ground, you can reach your subject’s eye level. This makes for much more intimate photos with animals.
You’re also less likely to be perceived as a threat to the animal this way — since the human outline will send most prey animals running before you can get close enough for a shot.
Even if you’re lucky enough to be photographing large animals like elephants, getting as low as possible (while staying safe!) can give an interesting and unusual new perspective.
#6 – Watch your backgrounds.
It’s easy to be so focused on the animal you’re following that you miss what’s going on around it.
If your backdrop is clean and tidy, then it won’t distract the viewer from the main subject of the photograph: the wildlife.
On the other hand, the animal can become lost in the shot if it’s placed against a messy and cluttered background.
Sometimes fixing this issue is as simple as taking a step to the side so that you have something nice and uniform for a backdrop — like sky, grass, or water — rather than bushes, twigs, or reeds.
#7 – Shoot wide.
It’s natural to want to get a stunning frame-filling shot of that eagle you’ve been watching for hours or that deer you’ve been carefully stalking.
While these pictures have their place, the main subject is actually surprisingly small in many of the most powerful wildlife images out there.
Shooting wide gives the viewer a better idea of where the animal lives and the challenges it faces in its everyday life — which helps them to connect on a much deeper level than they would with a close-up portrait.
If you can get close enough, using a wide angle lens will often prove to be the perfect choice to get a unique shot of the animal in its environment.
#8 – Shoot close.
This might seem to contradict the last piece of advice, but this isn’t necessarily advocating the standard full frame shot of a swan on the water or a gazelle bounding past.
Try going even closer, cutting out the background entirely and not even including the whole body of the subject.
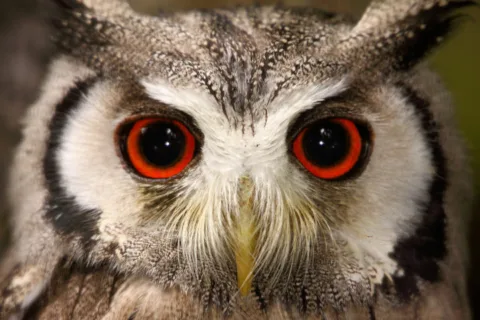
This puts the focus entirely on the animal you’re photographing, which can often result in an incredibly intimate and effective portrait when done well.
#9 – Use the rule of thirds.
A potentially brilliant photo can be ruined by poor composition, while good composition can transform an otherwise average photo into something far better.
The most basic compositional rule is the ‘rule of thirds’.
Just imagine your viewfinder split into 9 equal sections — 3 evenly spaced horizontal lines and 3 evenly spaced vertical lines. (Many smartphone cameras and point & shoot cameras have a ‘grid’ setting that you can turn on — which makes using the rule of thirds easier than ever.)
The idea is to place the most important elements of your image either along these lines or at their points of intersection.
This is a tried and tested technique, and will almost always result in better pictures than having your subject dead center in the frame.
#10 – Practice makes perfect.
No one really wants to hear this advice, but it’s probably the most important point here.
To put it simply, the more you go out with your camera, the more you’ll improve.
So get out there as often as possible, at every time of day, and under all weather conditions.
It won’t be long before you’re rewarded with fantastic wildlife photos that will have everyone asking if you’ve got any tips!
I'm a Photographer who's been documenting every moment of my life in pictures… for decades! I currently have 171,285 photos saved in 6,034 albums online (backed up in 3 different locations). Pet Photography and Travel Photography are my favorites — I'm always taking pictures of our dogs at home and of us on our multi-day motorcycle trips. When I'm not snapping photos, you can find me at the corner of Good News & Fun Times as publisher of The Fun Times Guide (32 fun & helpful websites).
